Dashboards
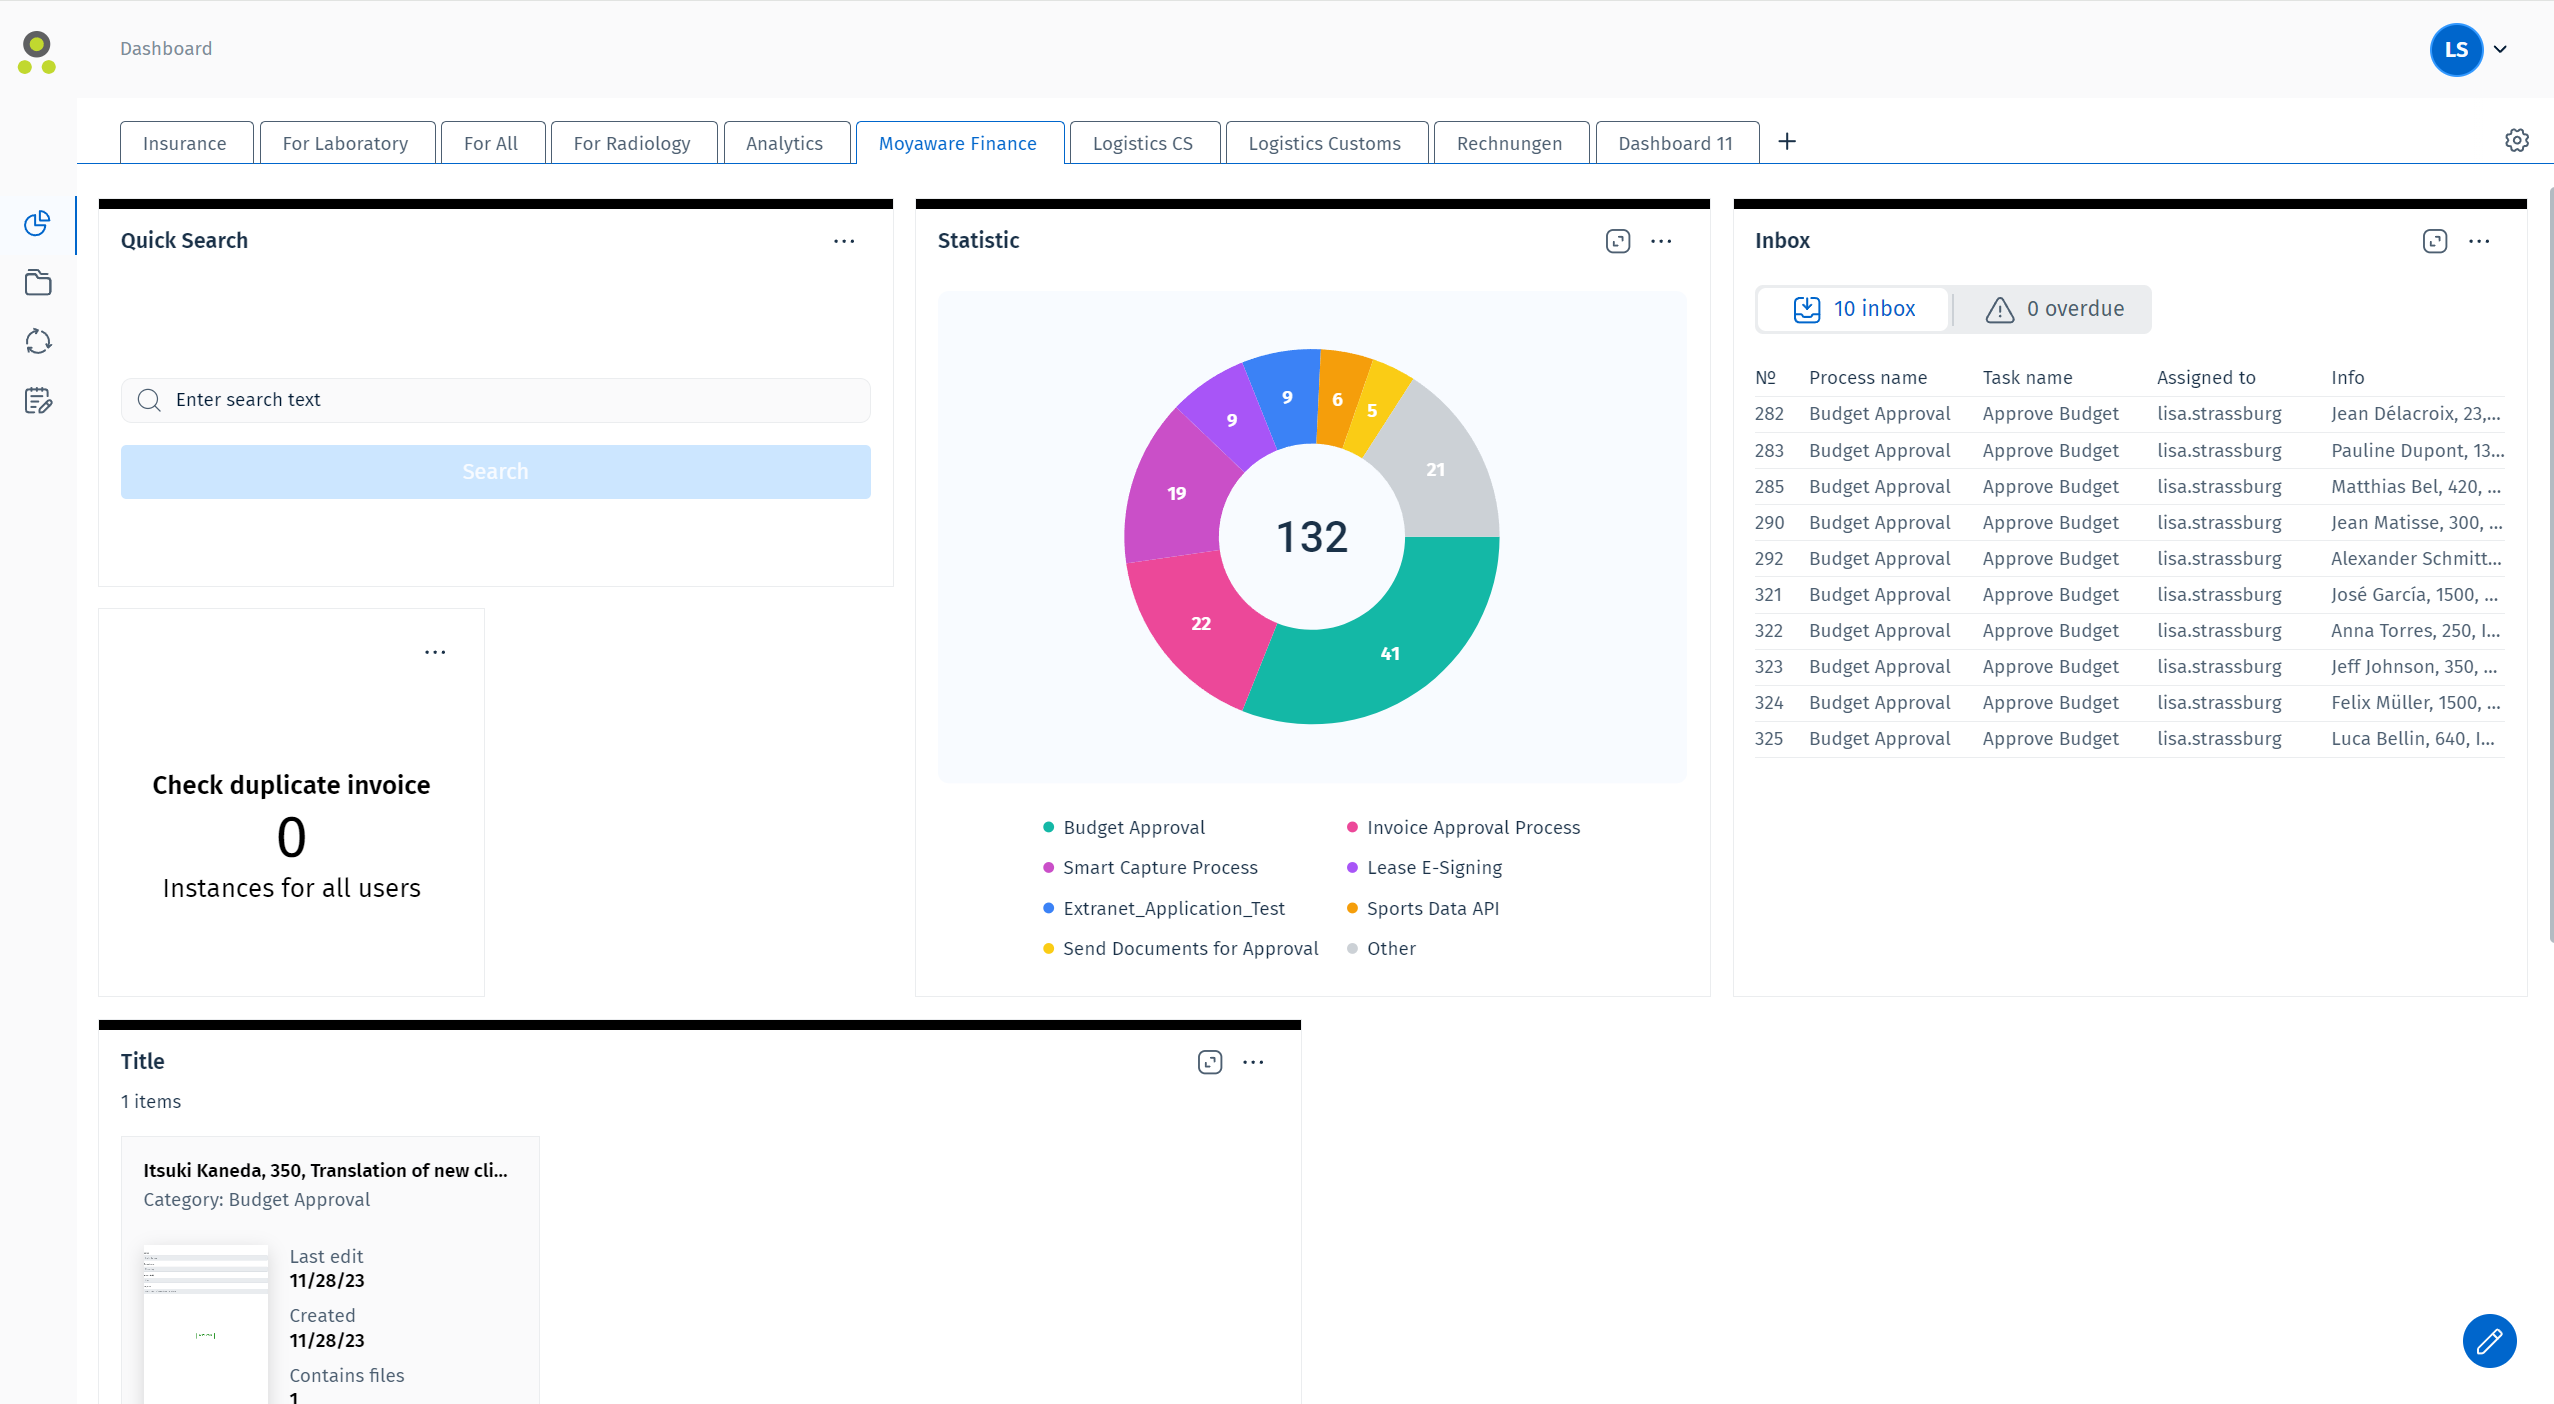
The Dashboards page of the Therefore™ Web Client allows the user to add various tiles linked to Therefore™ functionality or statistics. For example, the user can create a drop zone to add files directly to a specific category, show bookmarked documents, or display statistics from selected workflow instances.
An example of a dashboard with tiles:

|
|
Manage Dashboards Clicking the Manage Dashboards dialog in the upper right corner of the screen opens the Manage Dashboards dialog: |
|
|
Expand Tile
Click this icon to expand the view of a tile in order to see its contents better. |

|
Tile Context Menu
Click this icon to open the tile context menu. The options included in the menu are described below. |

|
Edit Dashboard Click this icon to enter edit mode allowing the user to add or remove tiles from the dashboard. |
In the tile context menu, the following options are available:

|
Configuration
Prompts the 'Add New Tile to Dashboard' dialog allowing the user to select the type of tile that should be added. This dialog is also prompted by clicking on an empty tile: |
|
|
Delete Delete the tile from the dashboard. |

|
Copy to dashboard Clicking this icon lets the user select another dashboard to copy the tile to. |
In edit mode, the following options are available:

|
Add Tile
Prompts the 'Add New Tile to Dashboard' dialog allowing the user to select the type of tile that should be added. This dialog is also prompted by clicking on an empty tile: |
|
|
Exit Edit Mode Saves the changes made to the dashboard and exits the editing mode. |

