Configuring Tree Views
Therefore™ can integrate into Windows Explorer by presenting a category's contents as a tree view. Administrators define how the index data values should be mapped into a tree structure and then users can navigate through the tree view.
Configuring Tree Views
-
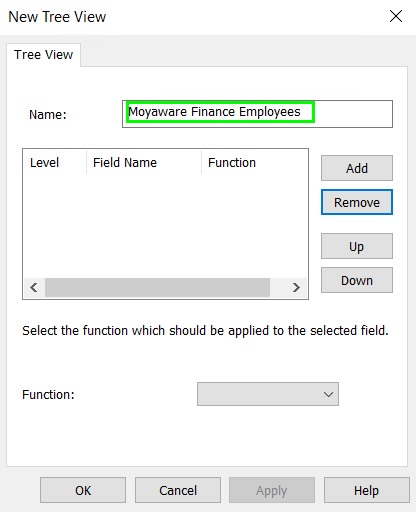
Expand the category for which you would like to create a tree view. Right-click on the Tree Views object and choose 'New Tree View'. A 'New Tree View' dialog will open. Give the Tree View a name. This name will be displayed in Windows Explorer as the top level folder.

-
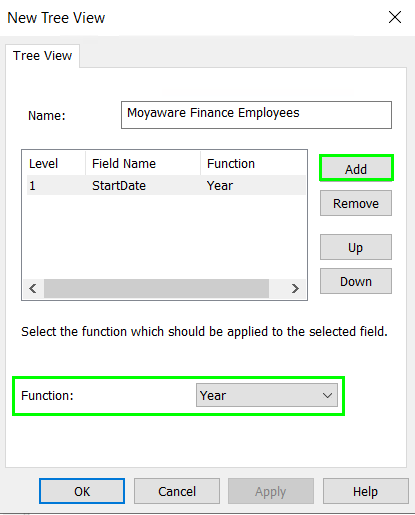
Next, define levels based on index field values that will be visible as folders in Windows Explorer. Click 'Add' and select an index data field that is defined in the category, then select a function for the level. The function will become the name of the second level folder in Windows Explorer.

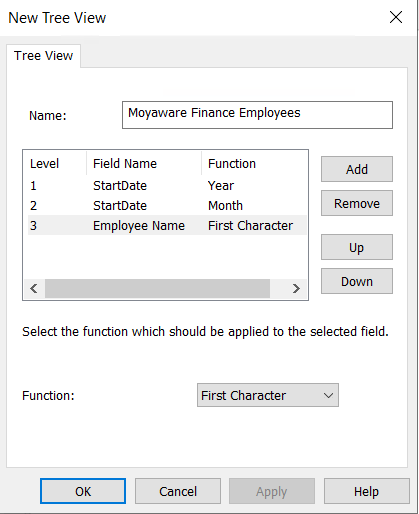
Using functions, the same index data field can be used to create multiple layers.
-
On date fields, the options for functions are 'None', 'Month', 'Year' or 'Month/Year'.
-
On string fields, the options are None or First Character.
-
-
A second and third layer are created in the same manner.

-
The created Tree View will now be visible under the category object.
-
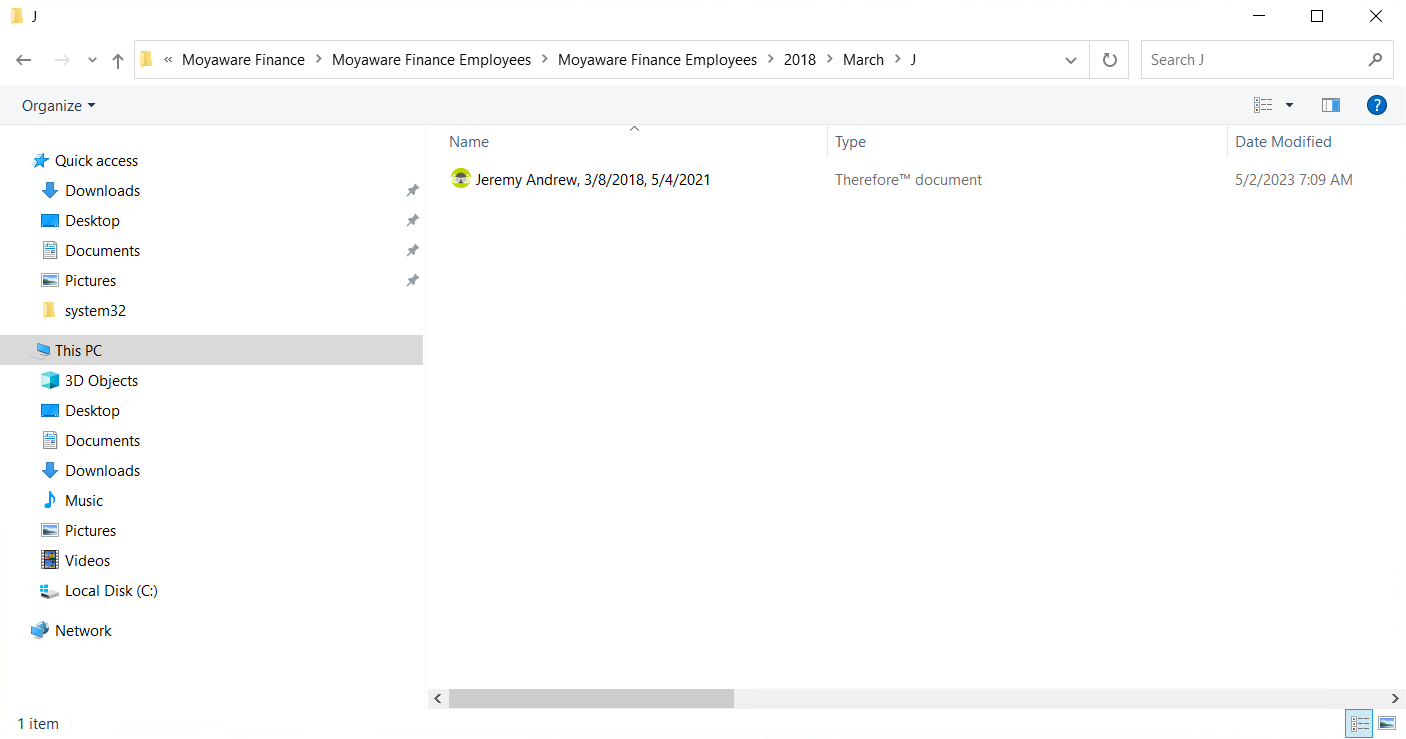
The tree view folders can be found under 'This PC' > 'Therefore™'.

