Installation
In order for the Therefore™ MFP Connector to run, the MFP Application need to be installed, as explained below. For Therefore™ Online users, the MFP Manager is managed by the Therefore™ Online team.

|
If certificates are used, it is recommended to use minimum 1024-bit RSA keys for certificates. |
-
-
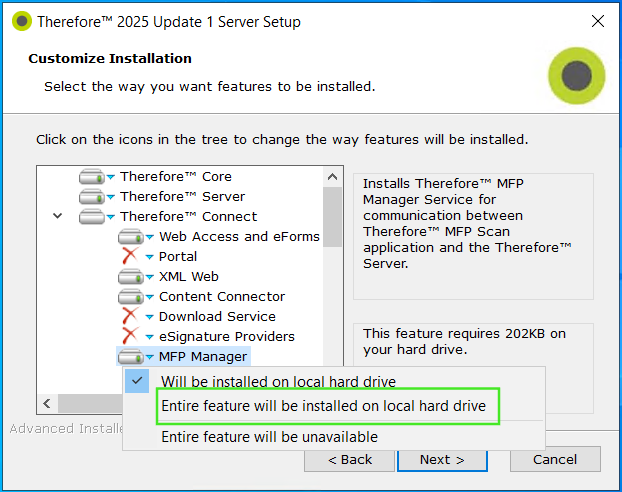
Check that the Therefore™ MFP Manager service is running.
Installing the Therefore™ MFP Application
First, it is necessary to install the MFP application on the device. Please download a .zip archive containing the application file and license file from the Therefore™ Extranet:
https://extranet.therefore.net/downloads/therefore-setup/
In the extracted archive, go to the sub folder matching your region. For each region, it contains a .jar file. Depending on the region, it also contains a .lic or .txt file.
Choose the option below that matches the type of file you have (.lic or .txt).
Installation using a .lic file
To install the Therefore™ MFP application using a .lic file, log into the following site and click 'Install MFP Application':
https://<Device Address>:8443/sms/
On older devices, use:
http://<Device Address>:8000/sms
Next, proceed to configuring authentication.
Installation using a .txt file
Devices without internet access
-
Copy the License Access Number from the text (.txt) file.
-
Go onto the License Management System portal:
-
Paste the License Access Number, select 'Issue Licenses', and click 'Next'.
-
Follow the instruction on the screen to issue a License file (.lic).
-
Follow the instructions listed in the option 'Installation using a .lic file', listed above:
Devices with internet access
-
Go to the 'Settings' option on the MFP device. It may be necessary to log in before commencing the installation.

-
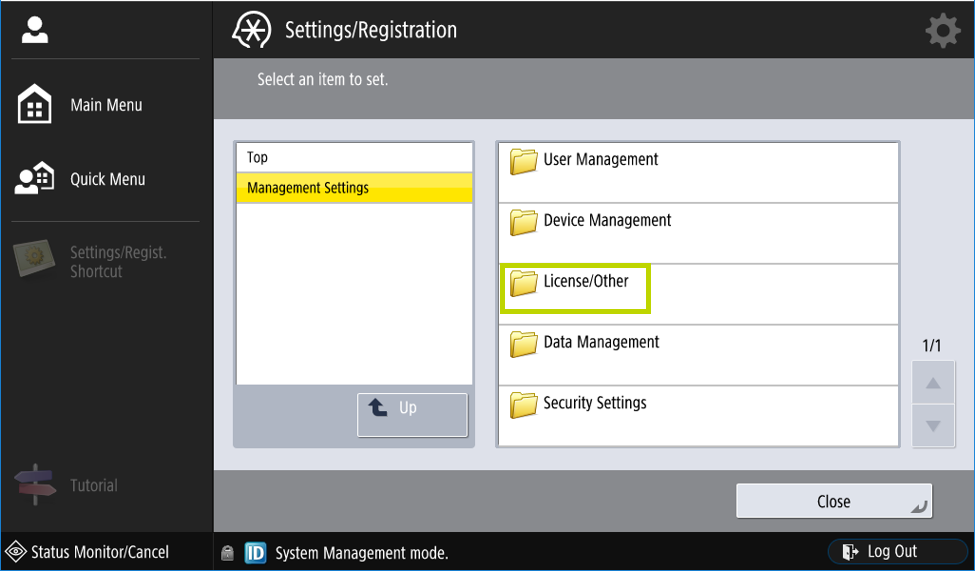
Select 'Management Settings', then 'License and Other', and then select the 'Register/Update Software' option.
-
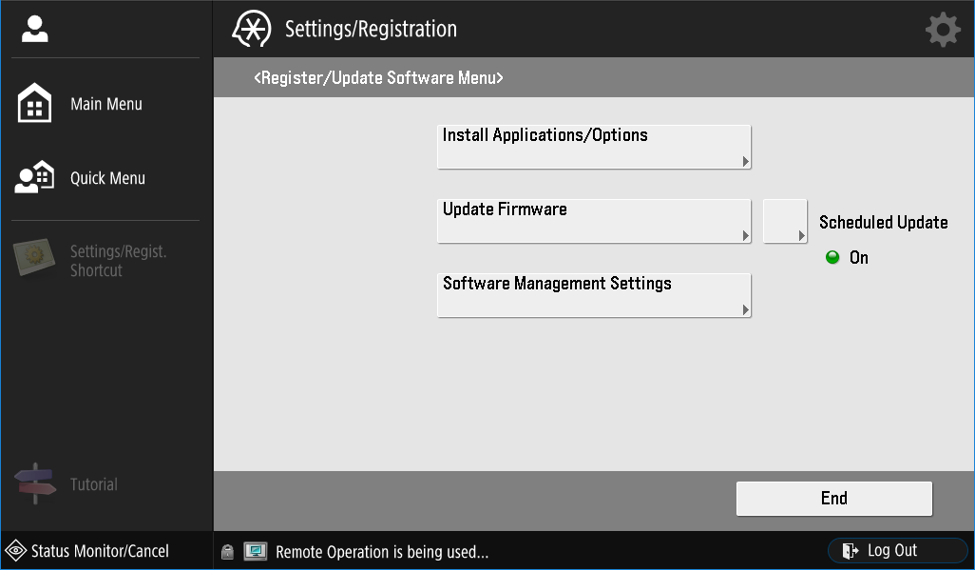
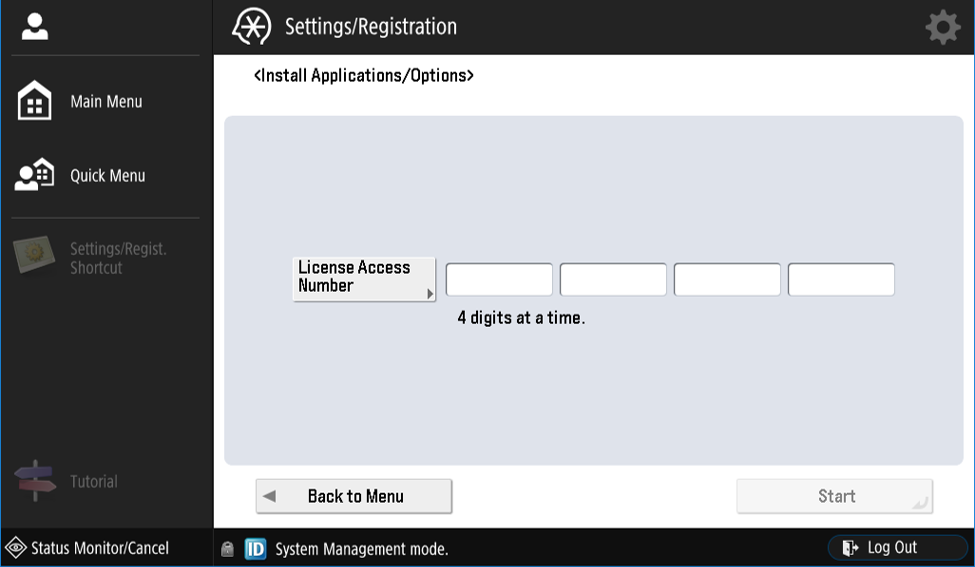
Select 'Install Applications/Options'.
-
Enter the License Access Number provided in the .txt file.
-
Select the Therefore™ MFP Application version to be installed and then click 'Install' to begin the process.

Press the button labeled 'Do not start' in case of a clean install.
In case of a clean install (no update), the app should NOT be started because the authentication information needs to be set before starting the app. In case of an update installation, setting the authentication information is not required and the app can be started right after the installation.
-
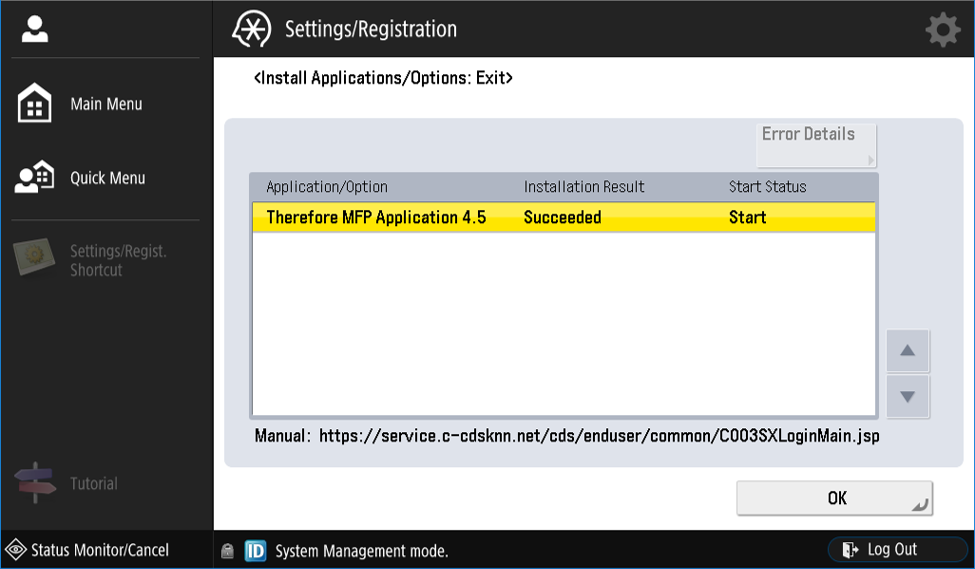
Once the installation process has been completed, click OK. Finally, log into the following address and proceed with authentication:
https://<Device Address>:8443/sms/On older devices use the following address:
http://<Device Address>:8000/sms